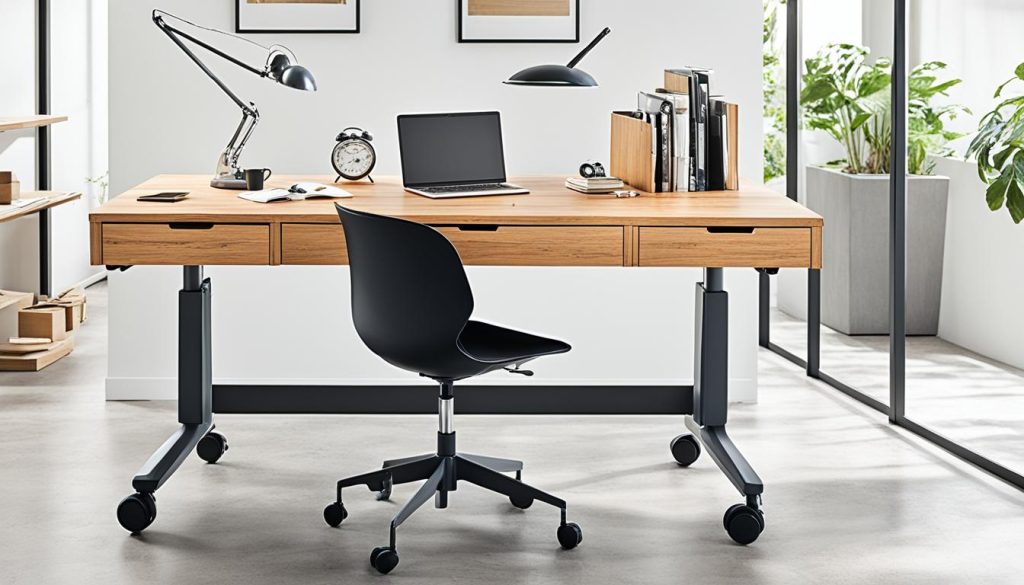
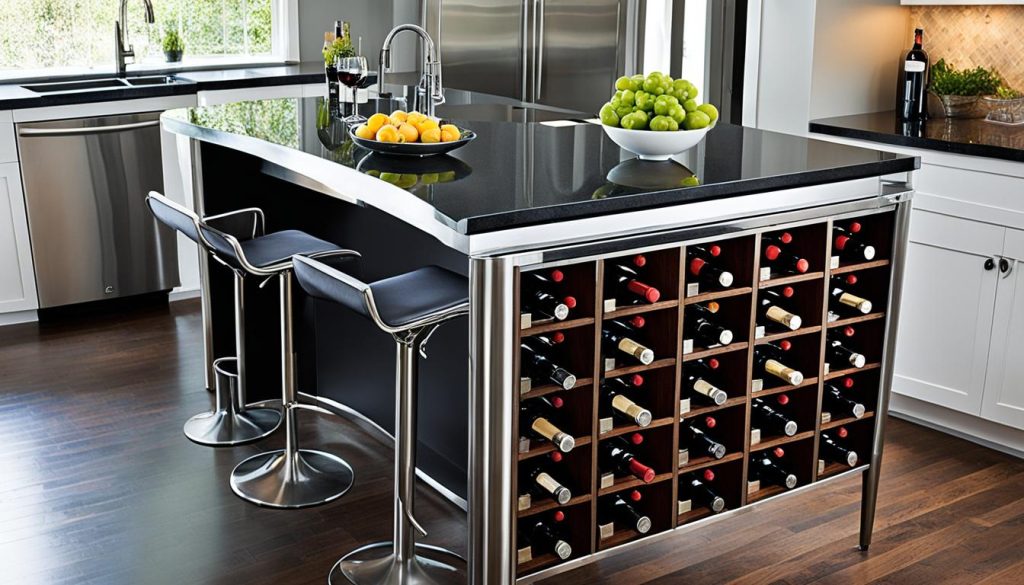
Transforming a desk into a kitchen island is a simple and budget-friendly DIY project. With the right tools and materials, you can repurpose your desk to create a functional and stylish addition to your kitchen. In this article, I will guide you through the step-by-step process of converting a desk into a kitchen island, providing you with tips and design ideas along the way.
How to Make a Desk into a Kitchen Island
- Repurposing a desk into a kitchen island is a cost-effective way to add functionality to your kitchen.
- Choose a sturdy desk that complements your kitchen’s style and dimensions.
- Prepare the desk by removing any accessories, cleaning the surface, and sanding it for a smooth finish.
- Adjust the desk’s height and add a countertop that matches your existing kitchen counters.
- Add functional features like drawers, shelves, or hooks to maximize the island’s usefulness.
Choosing the Right Desk for the Conversion
When embarking on a desk renovation project to transform it into a kitchen island, selecting the right desk is the first crucial step. Take into account the dimensions of the desk to ensure it fits perfectly in your kitchen space and provides ample counter space for your needs.
For optimal durability, look for a desk that is made of real wood and is sturdy enough to withstand the demands of a kitchen environment. Additionally, consider choosing a desk with drawers for added functionality and storage options.
It’s important to keep in mind the style and aesthetic of your kitchen when selecting a desk. Opt for a desk that complements the existing decor and seamlessly integrates into the overall design scheme.
By carefully choosing the right desk for your transformation, you’ll set a solid foundation for repurposing furniture and achieving a successful and visually appealing desk-to-kitchen-island conversion.


Key Points:
- Consider the dimensions of the desk to fit your kitchen space and provide sufficient counter space.
- Choose a desk made of real wood for durability.
- Opt for a desk with drawers for additional storage options.
- Select a desk that complements the style of your kitchen.
Preparing the Desk for the Transformation
Before diving into the exciting process of transforming your desk into a kitchen island, it’s important to properly prepare the desk. This step ensures a smooth and successful conversion. Here are the essential steps to get your desk ready:
- Remove any attached accessories or hardware: Take off any drawers, knobs, or other attachments from the desk. This will provide you with a clean canvas to work with during the transformation process.
- Clean the surface of the desk: Give the desk a thorough clean to remove any dust, dirt, or residue. Use a gentle cleaner and a soft cloth to ensure the surface is clean and ready for the next steps.
- Sand the desk for a smooth finish: Use sandpaper to gently sand the desk surface. This will create an even and smooth surface for painting or staining. Sanding also helps to remove any existing finish or imperfections, leaving you with a clean slate.
Now that your desk is clean and sanded, it’s time to decide on the final finish. Depending on your preference, you have two options:
- Paint the desk: If you want to add a pop of color or match your kitchen decor, painting is the way to go. Start by applying a primer to ensure better adhesion. Once the primer is dry, apply your chosen paint color using a brush or roller. Allow the paint to dry completely before moving on to the next steps.
- Stain the desk: If you prefer to highlight the natural beauty of the wood, staining is the ideal choice. Choose a wood stain that complements your kitchen decor and follow the manufacturer’s instructions for application. Apply the stain evenly using a brush or cloth, ensuring you cover all surfaces. Allow the stain to dry completely before proceeding.
With your desk prepared and its surface transformed, you’re one step closer to having a stunning kitchen island. Now, let’s move on to the next section to discover how to adjust the height and add a countertop to your desk-turned-kitchen island.
Adjusting the Height and Adding a Countertop
To make the desk suitable for use as a kitchen island, you need to adjust its height and add a countertop. Let me guide you through the process.
1. Measure the Height
The first step is to measure the height of your existing kitchen counters. You want to ensure that the desk, when transformed, is raised to the same level. This will create a seamless integration with your kitchen.
2. Adjust the Height
To adjust the height of the desk, you can add extra material to the bottom. Lockable casters or bun feet are popular choices. These not only raise the desk to the desired height but also provide mobility. This allows you to move the kitchen island when needed.
3. Choose a Countertop Material
Next, you need to select a suitable countertop material for your kitchen island. There are various options available, such as granite, quartz, or butcher block. Consider the style and functionality you desire when making your choice.
4. Cut and Secure the Countertop
Once you have chosen the countertop material, it’s time to have it cut to fit the dimensions of the desk. This can be done at a local home improvement store or by a professional. Ensure the measurements are accurate to achieve a perfect fit.
After the countertop has been cut, it’s important to securely attach it to the desk. You can use screws or construction adhesive to ensure it remains stable and durable.


Adding a countertop to your desk-turned-kitchen island not only enhances its functionality but also creates a beautiful and cohesive look in your kitchen. With the right adjustments and materials, your kitchen island will be ready to serve as a central hub for cooking, dining, and gathering with loved ones.
Adding Functional Features and Finishing Touches
Now that your desk has been transformed into a kitchen island, it’s time to make it even more functional and visually appealing. There are several desk repurposing ideas and desk conversion ideas you can consider to enhance the design and usability of your DIY kitchen island.
1. Storage Solutions
To maximize storage space, consider adding shelves or drawers to your kitchen island. This will provide a convenient place to store utensils, cookware, and other kitchen essentials. You can choose open shelves to display your favorite dishes or opt for closed drawers to keep items hidden and organized.
2. Pull-Out Cutting Board
A pull-out cutting board is a practical addition to your kitchen island, allowing you to easily access a dedicated space for food preparation. Install a sturdy cutting board that can be extended when needed and pushed back into the island when not in use. This will save valuable counter space and make chopping, slicing, and dicing more efficient.
3. Hooks for Hanging Utensils
Add hooks to the sides or back of your kitchen island to hang utensils such as spatulas, ladles, and kitchen towels. This not only adds a decorative touch but also keeps your most frequently used tools within easy reach, reducing clutter on your countertop.
4. Decorative Elements
Elevate the design of your kitchen island by incorporating decorative elements such as trim or beadboard. These details add visual interest and create a more polished look. Choose elements that match the style and aesthetic of your kitchen to maintain a cohesive design.
5. Hardware Selection
Don’t forget to choose hardware that complements the style of your kitchen island. Opt for knobs, handles, or pulls that match the overall design theme. Consider the material, finish, and shape of the hardware to ensure it brings a cohesive and finished look to your DIY kitchen island.
By incorporating these desk repurposing ideas and desk conversion ideas, you can elevate your kitchen island design and create a functional, stylish centerpiece for your kitchen. Now, let’s move on to the final section where you will learn how to showcase your finished DIY kitchen island.
Showcasing Your Finished DIY Kitchen Island
Now that you have successfully transformed your desk into a beautiful kitchen island, it’s time to showcase your finished project. Let’s explore some creative ideas on how to arrange and style your DIY kitchen island.
1. Functional and Decorative Items
Arrange your DIY kitchen island with functional and decorative items to make it a focal point in your kitchen. Consider adding a utensil holder, fruit basket, or decorative jars filled with colorful spices. These items not only enhance the visual appeal of your island but also make it more practical and efficient for everyday use.
2. Versatile Workspace
Your kitchen island can serve as a versatile workspace for cooking and meal prep. Clear a section of the countertop and keep essential tools like cutting boards, knives, and mixing bowls within easy reach. This allows you to optimize your kitchen workflow and makes preparing meals a breeze.
3. Serving Area
When hosting gatherings or parties, your DIY kitchen island can double as a convenient serving area. Set up a stylish display of appetizers, snacks, or beverages on the countertop. With the added space, you can easily accommodate multiple serving platters and ensure your guests enjoy easy access to delicious treats.
4. Gathering Spot
Transform your kitchen island into a cozy gathering spot for family and friends. Add bar stools or chairs around the island to create a casual seating area where loved ones can gather to chat and enjoy each other’s company. It’s the perfect place for morning coffee, homework sessions, or lively conversations while cooking.
By showcasing your DIY kitchen island in these different ways, you’ll fully appreciate the affordable kitchen upgrade you’ve achieved. Your creative furniture transformation has not only added functionality to your kitchen but also brought a unique touch to your home. Take pride in your accomplishment and enjoy the countless memories you’ll create around your stylish new kitchen island.
Conclusion
Repurposing furniture is a great way to unleash your creativity and add character to your home. By transforming a desk into a kitchen island, you can achieve a unique and personalized look for your kitchen while staying within your budget.
Throughout this article, I have provided you with valuable tips and ideas for renovating your desk into a functional and stylish kitchen island. Whether you choose to paint or stain the desk, incorporate storage options, or add decorative elements, the possibilities are endless.
By following the step-by-step process outlined in this article, you can embark on a desk renovation project that will not only enhance the functionality of your kitchen but also showcase your DIY skills. Embrace the satisfaction of repurposing furniture and enjoy the benefits of a one-of-a-kind kitchen island that reflects your unique style and personality.
