Painting a desk can give it a fresh, stylish look and breathe new life into your space. In this easy step-by-step guide, I’ll show you how to paint a desk perfectly, covering all the essential techniques and tips for achieving a professional finish.
Whether you’re a DIY enthusiast or just looking to revamp your workspace, painting a desk is a rewarding project that anyone can tackle. With the right tools and a little bit of know-how, you’ll be able to transform your desk into a stunning piece of furniture.
Key Takeaways:
- Follow these step-by-step instructions to paint your desk with ease.
- Gather all the necessary supplies before you begin.
- Properly prepare your desk by cleaning, filling gouges, and sanding.
- Use the right painting techniques and tools for a professional finish.
- Apply a topcoat to protect and enhance your painted desk.
Essential Desk Painting Supplies
Before you begin painting your desk, it’s important to gather all the necessary supplies. Here’s a list of the essential desk painting supplies you’ll need:
- Wood filler: Used to fill any cracks, holes, or imperfections in the desk surface.
- Putty knife: Helps to evenly apply and smooth out the wood filler.
- Palm sander with various sandpaper grits: Used to sand down the desk surface and create a smooth, even base for painting.
- Lint-free rags: Ideal for cleaning the desk surface and removing any dust or debris before painting.
- Cleaning spray: Helps to thoroughly clean the desk and ensure a pristine surface for painting.
- Trim roller and tray: Perfect for applying paint to larger, flat areas of the desk.
- High-quality angled paint brush: Essential for achieving clean lines and precision when painting corners and edges.
- Foam brush: Ideal for applying paint to smaller areas or intricate details on the desk.
- High-quality furniture paint: Choose a durable and long-lasting paint specially designed for furniture.
- Fusion Mineral Paint in Pressed Fern (recommended): A beautiful, on-trend color choice for your desk.
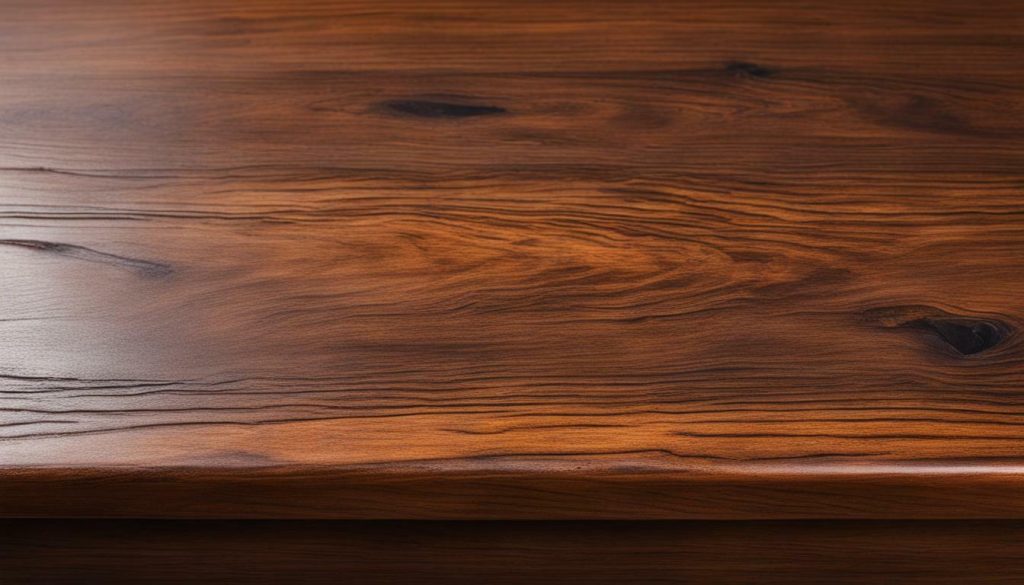
- Fusion Mineral Paint Stain and Finishing Oil in Natural: Provides a protective finish and enhances the natural beauty of the wood.
- Finishing oil: Helps to protect the desk surface and add a smooth, polished look.
- Hardware for reattachment: If you plan to remove any hardware from the desk, make sure you have the necessary screws for reattachment.
With these essential supplies, you’ll be well-equipped to tackle your desk painting project with confidence.
Preparing the Desk for Painting
Proper preparation is essential for achieving a flawless finish when painting a desk. Follow these steps to get your desk ready for painting:
Clean the Desk
Start by thoroughly cleaning the desk to remove any dust, dirt, or grease that may be on the surface. Use a mild detergent or a cleaning spray suitable for the desk material. Ensure that the desk is completely dry before proceeding to the next step.
Fill Gouges and Imperfections
Inspect the desk for any gouges, scratches, or imperfections. Use a wood filler to fill in these areas, following the manufacturer’s instructions. Use a putty knife to apply the filler, ensuring that it is smooth and level with the surface of the desk. Allow the filler to dry completely before proceeding.
Sand the Desk
Next, sand the desk to create a smooth and even surface for painting. Start with a coarse-grit sandpaper to remove any roughness or unevenness. Gradually move to finer-grit sandpaper to achieve a smooth finish. Be sure to sand in the direction of the wood grain for the best results. After sanding, wipe away any dust with a lint-free rag.
By following these steps, you’ll ensure that your desk is properly prepared for painting, allowing you to achieve a professional-looking finish.

Painting the Desk
Now that your desk is prepped and ready, it’s time to start painting. Follow these desk painting techniques and tips for a flawless finish.
Gather Your Painting Tools and Brushes
Before you begin painting, make sure you have all the necessary tools and brushes. Here’s a list of the essentials:
- High-quality angled paint brush
- Foam brush
- Trim roller and tray
Using a high-quality angled paint brush will help you achieve smooth and even brush strokes. A foam brush is great for applying paint to larger areas quickly. A trim roller and tray are useful when painting the desk’s flat surfaces for a uniform finish.
Apply Paint in Thin, Even Coats
When it comes to paint application, less is more. Apply thin coats of paint to avoid drips and uneven coverage. Start with a small amount of paint on your brush or roller, and spread it evenly across the desk’s surface. Work in small sections, overlapping each stroke for a seamless finish.
“Remember, patience is key when painting a desk. Take your time and allow each coat of paint to dry completely before applying the next. This will ensure a professional-looking finish.”
If you’re using a foam brush, consider using long, smooth strokes for a consistent finish. For the angled paint brush, try using short, controlled strokes to avoid brush marks or streaks.
Allow Proper Drying and Cure Time
After applying each coat of paint, allow it to dry completely before moving on to the next coat. Follow the manufacturer’s instructions for drying and curing times. Keep in mind that some paints may require multiple coats to achieve the desired color and coverage.

| Desk Painting Techniques | Painting Tools and Brushes | Paint Application Tips |
|---|---|---|
| Apply paint in thin, even coats | High-quality angled paint brush | Less is more – use thin coats of paint |
| Allow proper drying and cure time | Foam brush | Work in small sections, overlap each stroke |
| Trim roller and tray | Use long, smooth strokes for a consistent finish |
Applying the Finishing Touches
Once you have finished painting your desk, it’s crucial to apply the right finishing touches to protect and enhance the newly painted surface. This final step in the desk refinishing process involves applying a topcoat that will provide durability and a professional-looking finish.
Table: Desk Finishing Products
| Product | Description |
|---|---|
| Water-based polyurethane | A clear topcoat that offers excellent protection against scratches and stains. It dries quickly and has a low odor. |
| Wax | A traditional finish that provides a smooth and lustrous surface. It requires regular reapplication but gives the desk a warm, antique look. |
| Polyacrylic | A water-based topcoat that offers similar protection to polyurethane but with a quicker drying time. It is available in different sheen levels. |
| Lacquer | A solvent-based topcoat that provides a durable and glossy finish. It requires careful application and proper ventilation due to its strong fumes. |
When choosing a topcoat for your desk, consider factors such as the desired level of protection, the finish you prefer, and the specific maintenance requirements of each product. Follow the manufacturer’s instructions for application and drying times.
To apply the topcoat, use a high-quality brush or foam brush to ensure a smooth and even finish. Work in thin, even strokes, following the direction of the wood grain. Apply multiple thin coats, allowing each coat to dry completely before applying the next. This will help prevent drips, streaks, and bubbles.
Once you have completed the topcoat application, allow the desk to dry according to the manufacturer’s recommendations before placing any objects on its surface. This will ensure the topcoat cures properly, providing the ultimate protection for your newly painted desk.
Tips for Achieving a Professional Finish on Your Desk
When it comes to painting a desk, following the right tips and techniques can make all the difference in achieving a professional-looking finish. Here are some valuable tips to keep in mind:
1. Proper Surface Preparation:
Before you start painting, it’s essential to properly prepare the surface of your desk. This includes cleaning the desk thoroughly, filling any gouges or imperfections with wood filler, and sanding the desk to create a smooth and even surface. Taking the time to prep the desk will ensure better adhesion and a smoother finish.
2. Use High-Quality Paint and Tools:
Investing in high-quality paint and tools is crucial for achieving a professional finish. Choose a durable and furniture-grade paint that is suitable for your desk material. Additionally, use high-quality brushes and rollers that are designed for a smooth and even application. The right tools will help you achieve a flawless finish with minimal brushstrokes or roller marks.
3. Apply Thin Coats and Multiple Layers:
When it comes to painting a desk, it’s better to apply multiple thin coats rather than one thick coat. Thin coats dry more evenly and are less likely to result in drips or visible brushstrokes. Allow each coat to dry completely before applying the next layer. Building up thin layers will give you a more professional-looking finish.
4. Pay Attention to Details:
Don’t forget about the small details that can elevate the overall look of your painted desk. Take the time to paint the edges and corners carefully, ensuring full coverage and a seamless transition between different sections. Also, consider using a small brush or foam brush for intricate areas or decorative elements. Paying attention to details will make your desk look polished and professional.
By following these tips and techniques, you can achieve a professional finish when painting your desk. Remember to properly prepare the surface, use high-quality paint and tools, apply thin coats, and pay attention to the details. With a little patience and effort, your desk will have a beautiful and professional-looking finish that you can be proud of.
Desk Paint Color Ideas
Choosing the right paint color for your desk can greatly enhance its overall look and complement the style of your space. Whether you prefer a bold and vibrant statement or a subtle and calming aesthetic, there are endless options to consider. Here are some desk paint color ideas to inspire your creativity:
1. Classic White
A classic white desk is timeless and versatile, creating a clean and crisp look in any setting. This color choice works well with various decor styles, from modern and minimalist to traditional and farmhouse.
2. Bold and Vibrant
If you want to make a bold statement with your desk, consider vibrant colors like navy blue, emerald green, or vibrant yellow. These bold hues can add personality and create a focal point in your space. Just make sure to choose a shade that complements the overall color scheme of the room.
3. Neutral and Serene
For a calming and serene workspace, opt for neutral shades like beige, gray, or soft pastels. These colors create a soothing atmosphere and promote productivity and focus. Pair your neutral desk with natural wood finishes or pops of greenery for a harmonious look.
| Color | Description |
|---|---|
| Classic White | A timeless and versatile choice that complements any style. |
| Bold and Vibrant | Make a statement with navy blue, emerald green, or vibrant yellow. |
| Neutral and Serene | Create a calming atmosphere with beige, gray, or soft pastels. |
Remember, the color you choose for your desk should reflect your personal style and the overall ambiance you want to create in your workspace. Don’t be afraid to experiment and consider using color swatches or paint samples to visualize how the color will look in your space before committing to a specific shade. With the right paint color, your desk can become a beautiful focal point and inspire creativity in your daily work.
Conclusion
Painting a desk can be a rewarding DIY project that breathes new life into your space. By following this step-by-step guide, you can achieve a professional finish and give your desk a fresh makeover.
To ensure success, start by gathering all the necessary supplies, including wood filler, sandpaper, and high-quality paint. Properly prepare your desk by cleaning it, filling any gouges, and sanding the surface for a smooth finish.
When it’s time to paint, remember to apply multiple thin coats for better coverage and durability. Use high-quality brushes and rollers for a flawless application. Finally, don’t forget to protect and enhance your newly painted desk by applying a finishing topcoat.
With a little time and effort, you can transform your old desk into a stunning piece of furniture. This desk restoration guide will help you achieve a DIY desk makeover that will impress and inspire. So go ahead, unleash your creativity, and enjoy the process of transforming your desk into a beautiful centerpiece for your space.
FAQ
What supplies do I need to paint a desk?
You will need wood filler, putty knife, palm sander with various sandpaper grits, lint-free rags, cleaning spray, trim roller and tray, high-quality angled paint brush, foam brush, high-quality furniture paint, Fusion Mineral Paint in Pressed Fern (recommended), Fusion Mineral Paint Stain and Finishing Oil in Natural, finishing oil, and hardware for reattachment.
How do I prepare my desk for painting?
To prepare your desk, you need to clean it thoroughly, fill any gouges or holes with wood filler, sand the surface to create a smooth texture, and clean it again to remove any dust or debris.
What are the steps for painting a desk?
The steps for painting a desk are: apply a primer if necessary, apply multiple thin coats of paint, let each coat dry thoroughly, lightly sand between coats if needed, and apply a protective topcoat for durability.
How can I achieve a professional finish on my desk?
To achieve a professional finish, make sure to properly prepare your desk, use high-quality tools and brushes for paint application, apply multiple thin coats of paint, sand between coats if necessary, and finish with a protective topcoat.
What are some desk paint color ideas?
Some desk paint color ideas include neutral shades like white or gray for a classic look, bold colors like blue or green for a statement piece, or a natural wood stain for a more rustic feel.
Is painting a desk a difficult DIY project?
Painting a desk can be a rewarding DIY project, especially if you follow the step-by-step guide and use the right techniques. With some time and effort, you can achieve a professional finish and transform the look of your space.